Welcome, and congratulations on getting started with the most powerful camera app for iPhone.
Created to fully utilize all of the powerful capabilities of iPhone, Halide unlocks the incredible photographic potential of your device.
To help get you familiar with everything Halide, we've created a ten-part series on the basics.
The Halide Pro Camera Interface
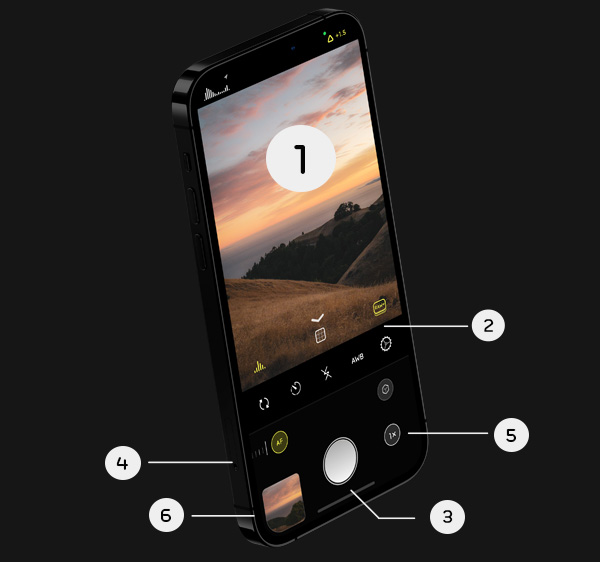
Let’s get you familiar with Halide, starting with the app’s layout. Obviously, we’ve got the ⓵ Viewfinder, where what you see is what you get.
Next, we’ve got the ⓶ Quickbar, where controls like the grid, capture formats, timer, and Halide settings live. It can be expanded and collapsed by swiping on it. That's how you can get to Settings, too.
Below that, we have additional controls such as the ⓷ Shutter, ⓸ Focus ring, ⓹ Lens switcher, and the ⓺ Gallery.
Using the app
To select your point of focus or exposure, simply tap anywhere in the viewfinder, just like the regular Camera app.
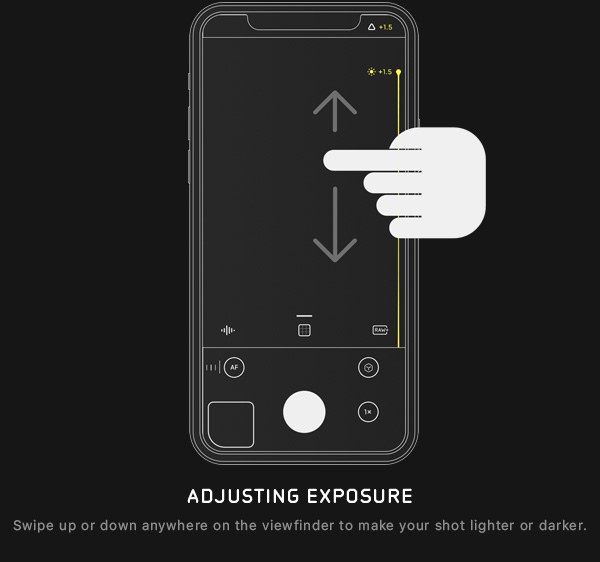
Halide also offers more precise control with gestures: just swipe up or down anywhere on the viewfinder to adjust your exposure.
If you’d like to switch lenses, simply tap on the lens switcher in the bottom-right corner — or try tap-and-holding if your iPhone has more than two lenses.
Reviewing the images you’ve captured is easy. Simply tap on the preview in the bottom-left corner to view the image and its corresponding metadata.
That’s it for now. In our next tutorial, we'll look at manual focus!